The most frustrating thing for me about Hugin is when I take too large a step and the optimizer goes south. Or the preview window starts to show some links heading off to outer space. It usually occurs right when it gets tough, e.g., completing a 360deg connection, or doing one of those global optimizations and not noticing it went bad. Then I try and fix the problem and wind up making it worse because I don’t really know what I am doing.
Then I am stuck with a completely buggered file and I don’t know how to get back. Sure I save copies along the way, but I hate the lost work. Also, even after I step back, I am liable to repeat my error at some point.
I’ve seen no tutorials about how to do this. I suspect it is because the issue is deemed too obvious by the developers to be worth mentioning to . But with something as complex as Hugin, that isn’t true.
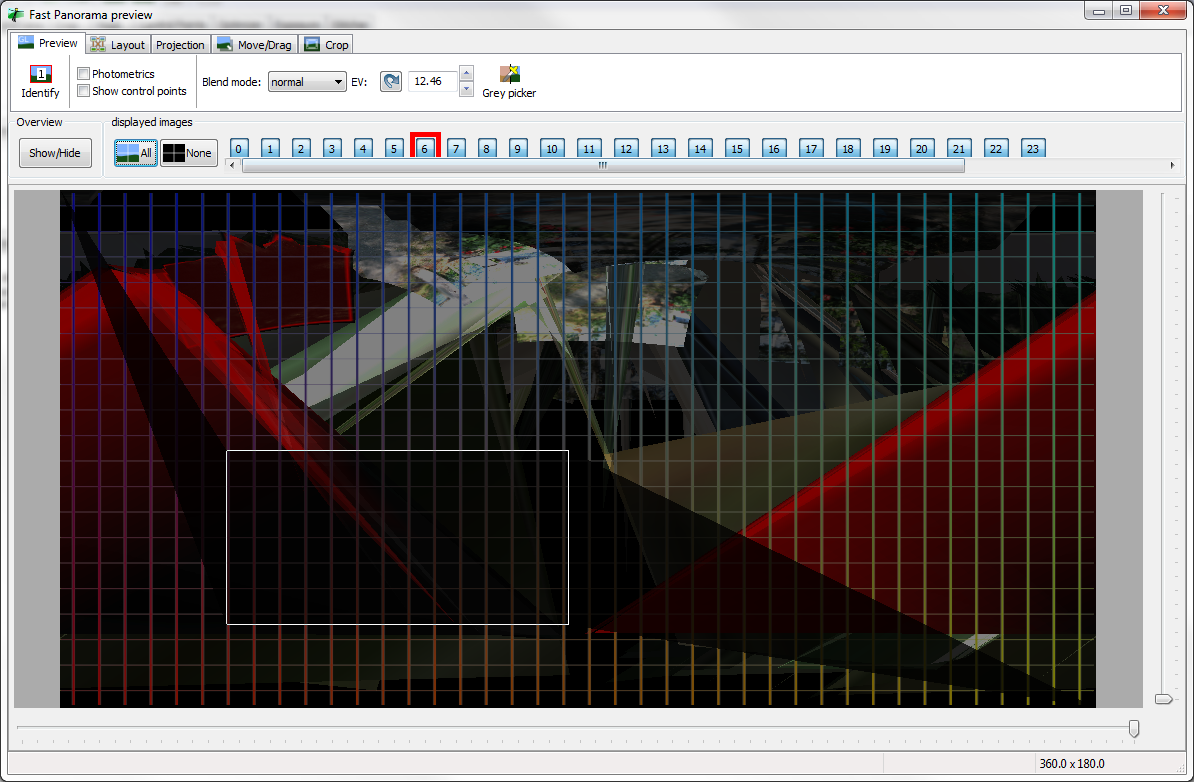
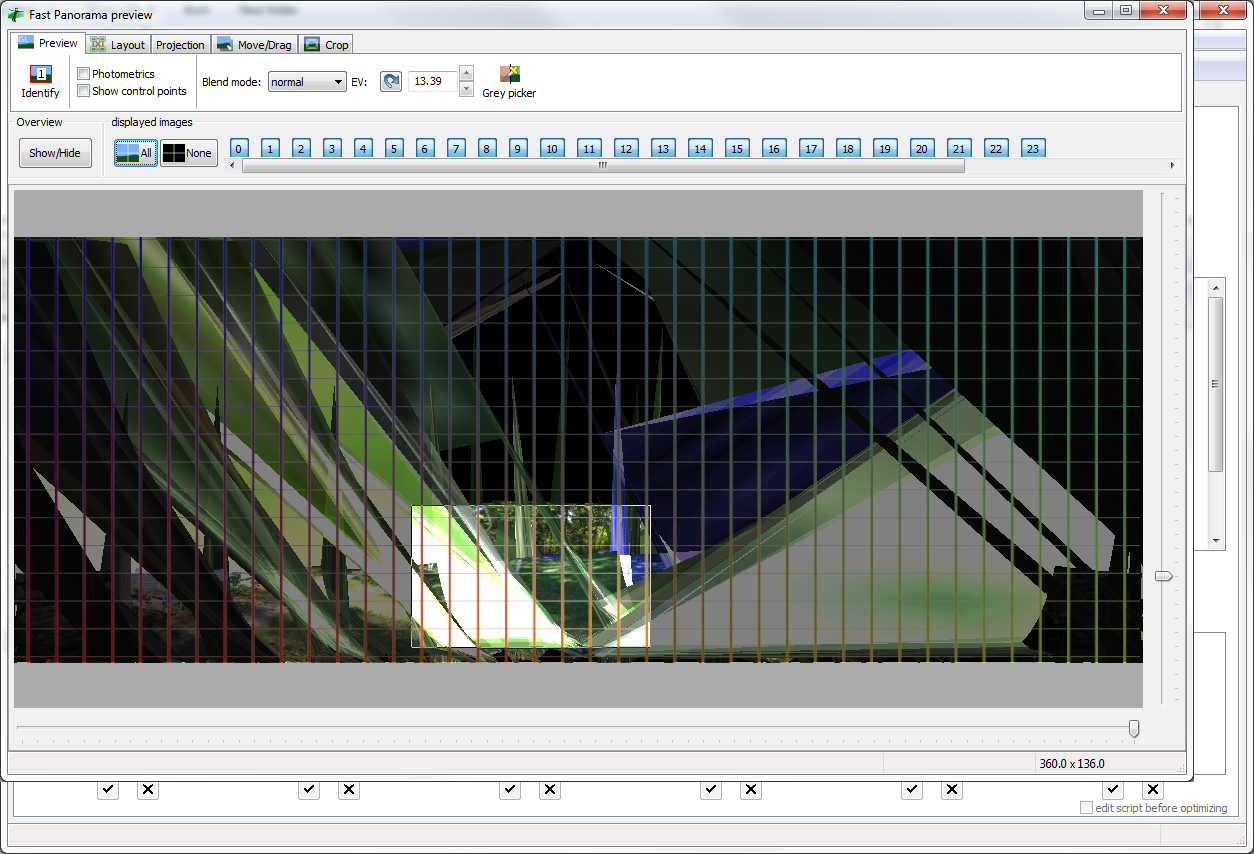
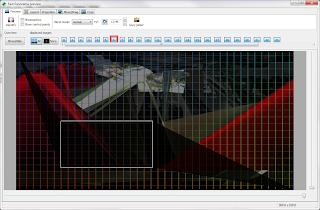
Well, I finally managed to recover a butchered file, and this is how I did it. For reference, this was my starting point: The Hugin preview window completely hosed and liable to crash anytime I sneezed:
The basic procedure is to keep all the control points (unless you’ve added some bad ones) and reset all the adjustments.
1) Go to the Images tab and reset all the adjustment variables. Select all the images, then click the “Reset” button hiding in the “Image Position”.
The result being that all the values the yaw, pitch, roll, X, Y and Z columns are reset to zero like so:
Note that I do have one image selected as the Anchor. This is important. Pick the one image you want as your “centerpoint”, then click the button “Anchor this image for position” (it is on the lower left in the above picture).
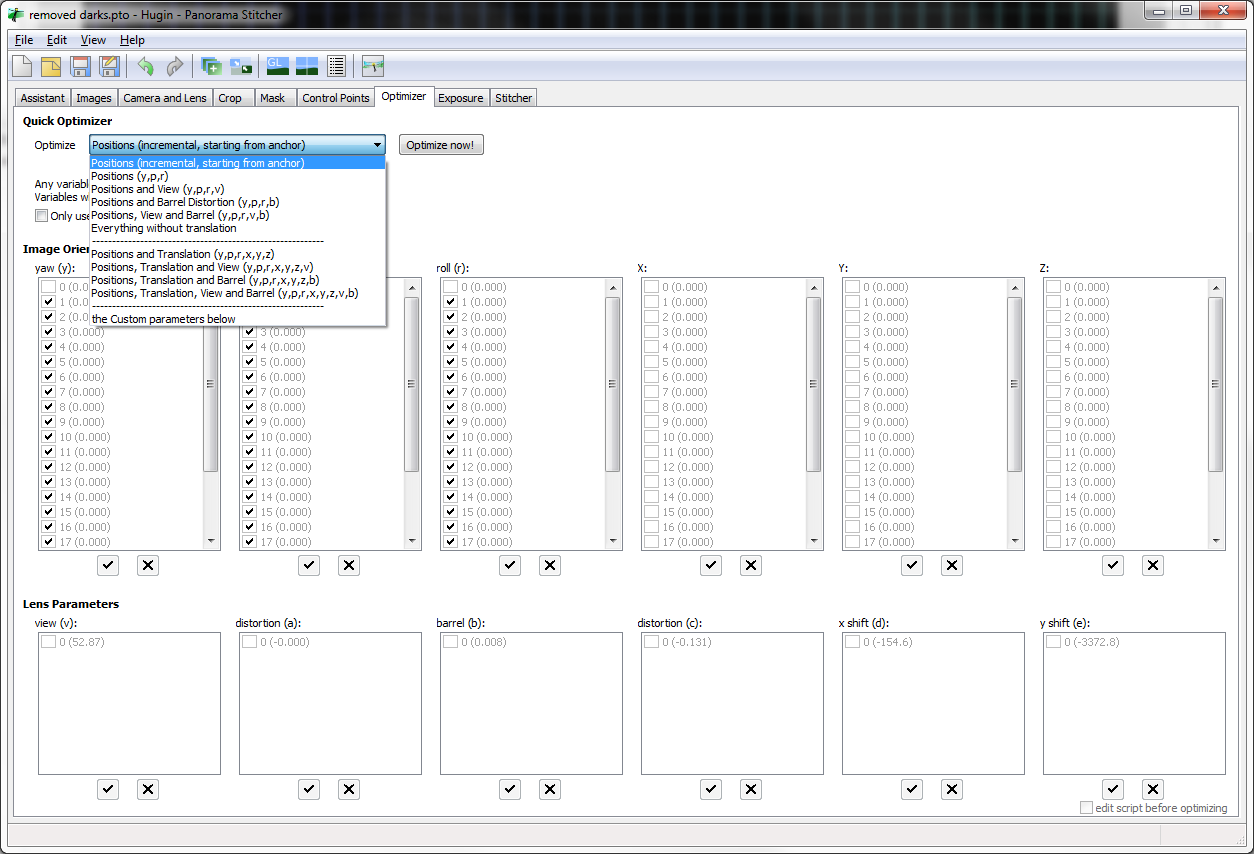
Now go to the optimizer tab. We are going to do baby steps. First, in the Optimize dropdown, select
the option “Positions (increment, starting from anchor). This tell the optimizer not to do a “global optimization”. Rather, it will start from the anchor, then position the anchor’s neighbors, then the neighbor’s neighbors, and so forth.
If things are really bad, you can also tell the optimizer to work on a subset of the images only. You can do this by checking and unchecking values in the tables, or you can check the “Only use control points between image selected in preview window”, then pull up your preview window and show/hide images there. Anyway, the picture below shows me ready to do my first optimization on all the images:
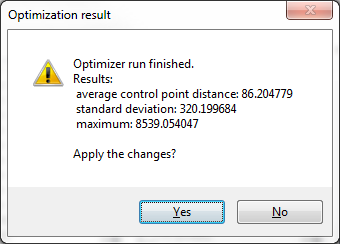
After a while, hugin is down optimizing. However, I still have serious problems. Look at the result! One of my control points is still messed up by 8539 something-or-others.
Pretty serious now, because there isn’t (afaik) any simpler way of starting the optimization.
To back up a second, I could also have tried to optimize using the “Align” button in the “Assistant” tab. The problem is that this can easily get stuck in error-land … get almost all the way done then close the progress window and tell you that it failed. I had been stuck in error-land when I started this operation, but now I tried the “Align” approach and it worked! Well, worked without throwing an error. Still having a few problems, as can be seen in the preview window:
However, you should always check the Assistant tab because it does tell you useful information at times. For example, now it is telling me that I have a wee spot of bother. Thank you, computer:
You can also check to see if you have some bad control points. Pull up the “Control points table” (It is in the “View” menu) and scroll down, looking for bad points. (Too bad it won’t sort in order of badness.) If you see a row with a very high value, click on the row, and Hugin will show you the control points tab with the offending point. In my case, all my control points are correct, so phooey.
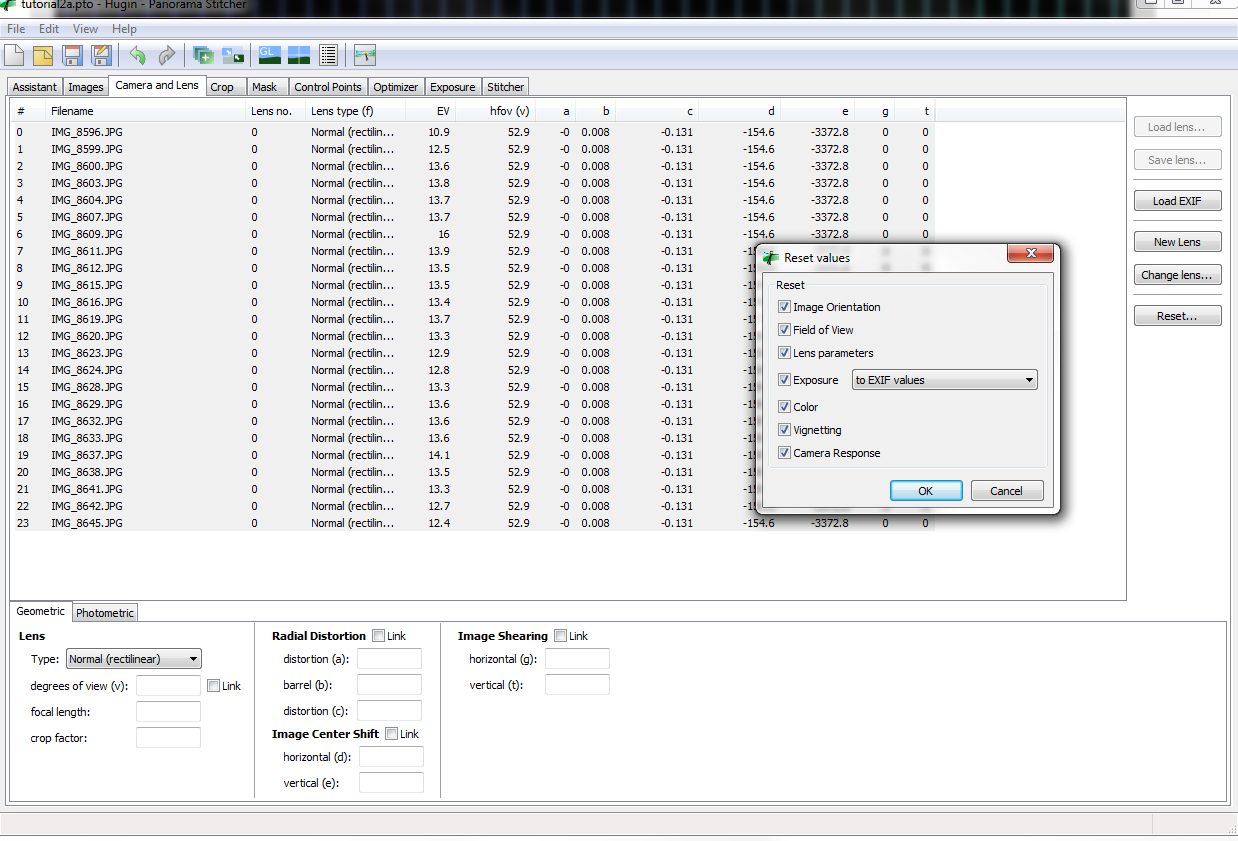
And now we come to the offending tab that has always eluded me before. The “Camera and Lens” tab:
What if these values have turned into garbage? In fact, they have. I’m going to select all the rows, then click the “Reset” button:
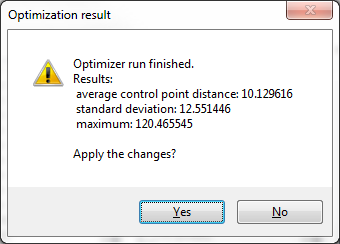
And do the optimization again. A bit better result this time ;-)
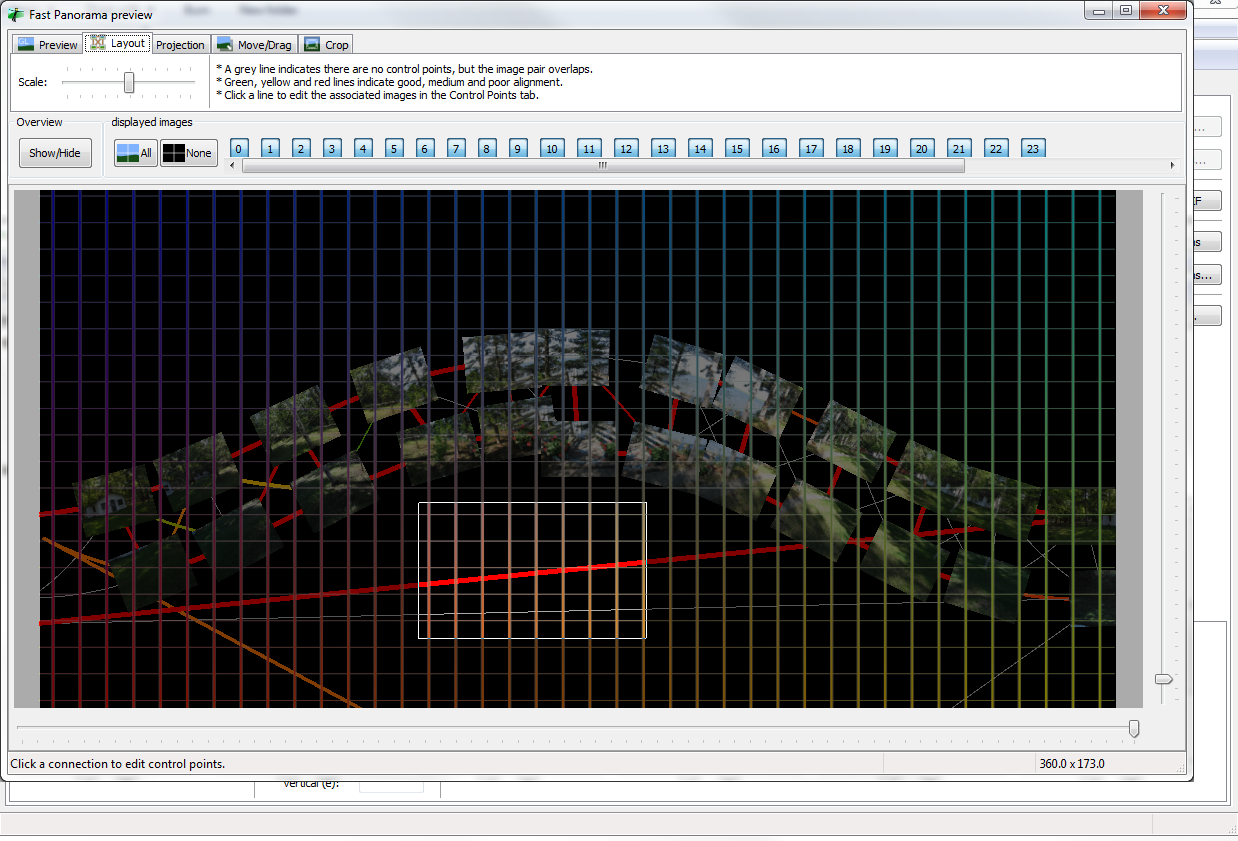
And in the preview window, we can see that reality is not too far away.
In that last window, I obviously have some remaining issues, as all my control points are shown as poor. Also, some links go off into space. I think the latter are ok and are caused by the fact that my images are in 360deg.
Now the optimizer has regained reality, we can step towards a better fit. Check
Hugin Optimize documentation to gain an understanding of what it does. For me, I can click on “Everything without translation” and run.
That is it for now. So the keys are:
(1) Reset the orientation values in the Images tab.
(2) Reset the camera data in the “camera and Lens” tab.
(3) Optimize with “Positions (increment, starting from anchor)” in the Optimizer tab.
And good luck to you.