So we’re remodeling the kitchen. The impetus was getting fed up with the electrical stove and lack of vent. That plus watching the excellent contractor working next door and his crew showing up 7AM to 7PM including weekends. Hard to find good people so we pulled the trigger.
Expected to take 1 month. Removing the wall to the dining room. Hard wood floors. New appliances except for the fridge. Custom cabinets.
Following picture was taken the night before the work started, Jan 21.

Kitchen the night before
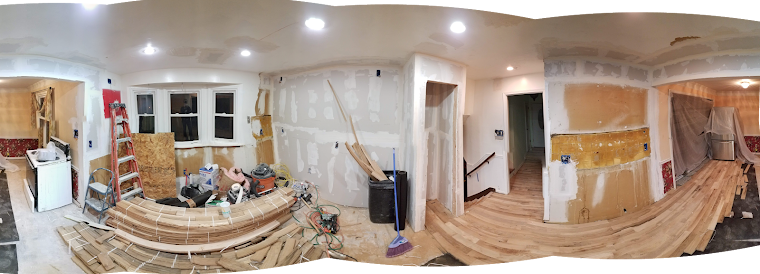
Day 1 was a full day of demolition. Dramatic and happens fast. They even managed to add the frame for the pantry. Jan 22

24 hours later after demolition
Electrical dry walling was next. After that was the hard wood floors. Thus endeth week 1, day 4, Jan 25.
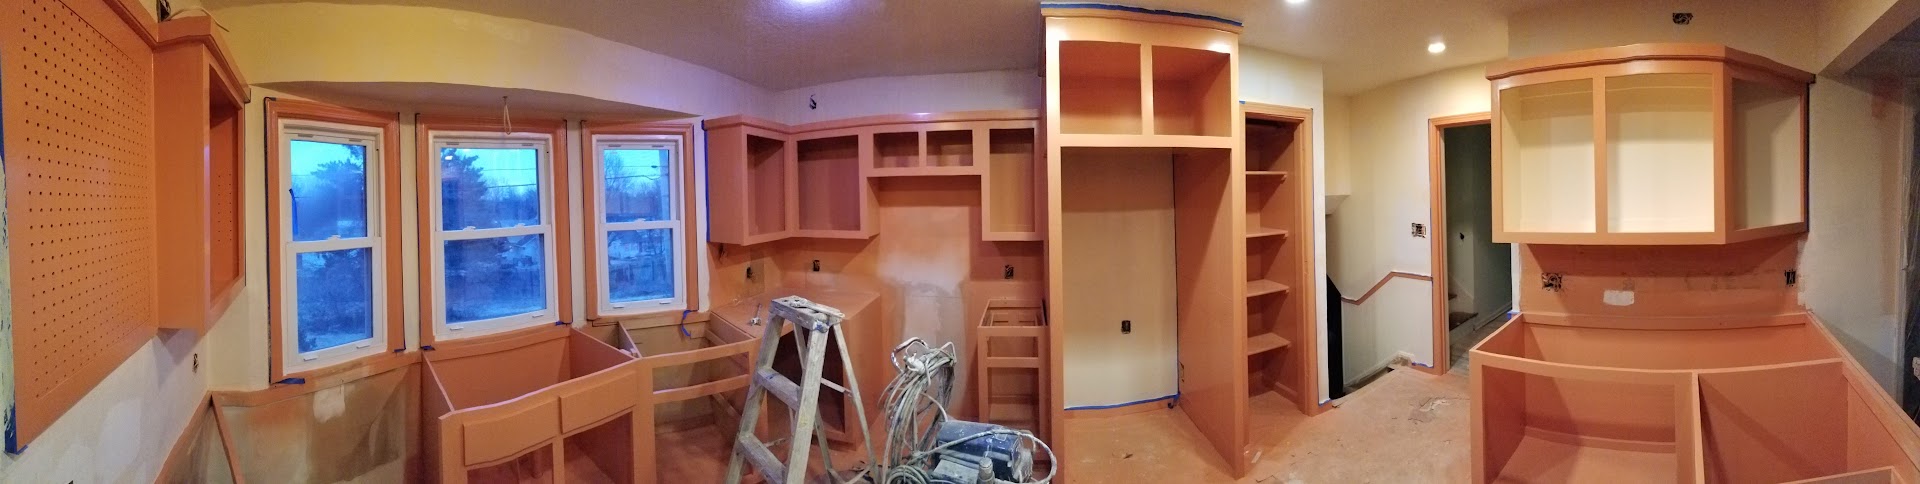
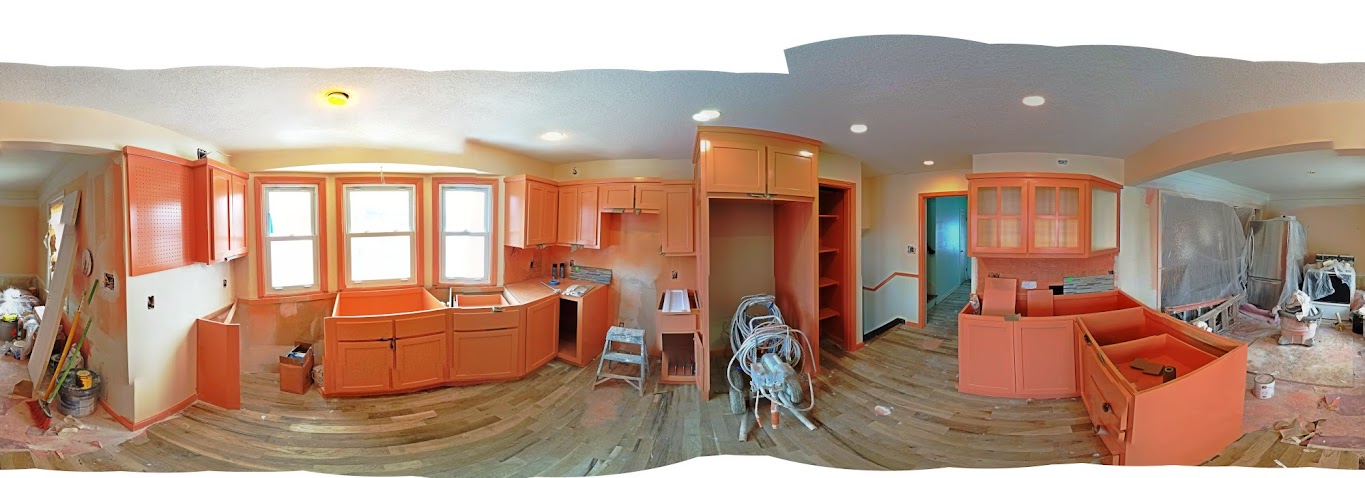
Next was the custom cabinets. 6 full days of 2-3 people. We had a tricky situation with the bay windows and future sink. No problem. These guys figured it out as they went and did it perfectly. We added a peg board to an open space, and neat triangular diagonal section facing the dining room. Do not buy standard cabinets and expect to like the results. I repeat, do not buy standard cabinets. The customization is critical and well worth it.

Onto painting. And this gets stressful. First, you’re going to come home to a house where you can’t breathe. Meaning the entire area is either walled off or completely open with fans blasting the air out windows into 10 degF outside weather. You bundle up and watch the house temperature drop to 53 degF and do your best.
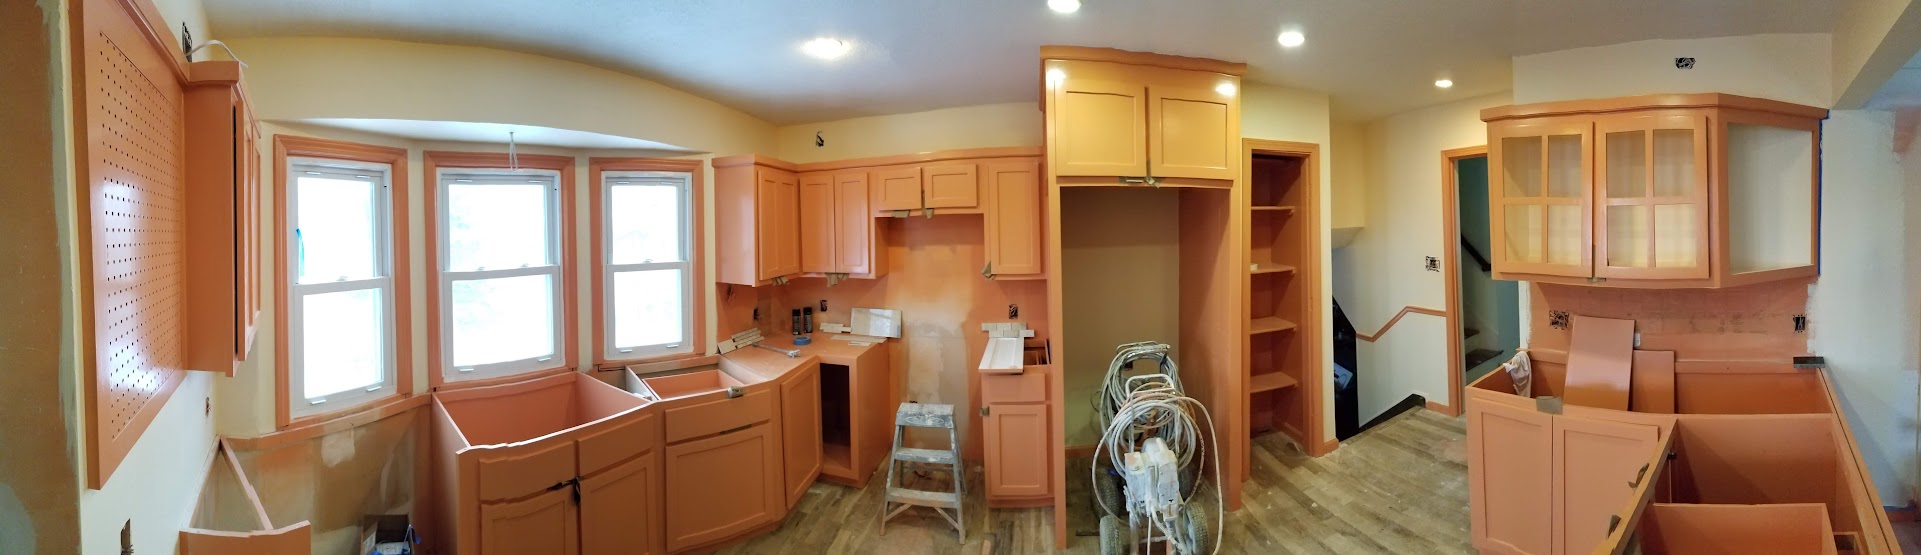
Worse is that you’ve picked the wrong color and it is overwhelming. The ripe apricot looks bright orange in warm light (see peg board) and coral pink in cool light (see fridge cabinet)! Lesson learned: Do not use water-based paint to test when the final paint will be oil-based.
So we cost ourselves a day. We didn’t want to go into the brown-ier shades, even though that would have been safer, given the different lighting conditions. We tried the next darker shade of ripe apricot and that did what we wanted. Even that was scary, as practically the entire kitchen was one dominant color, and we had to take to visualize and gamble that the walls and countertop would balance things out.
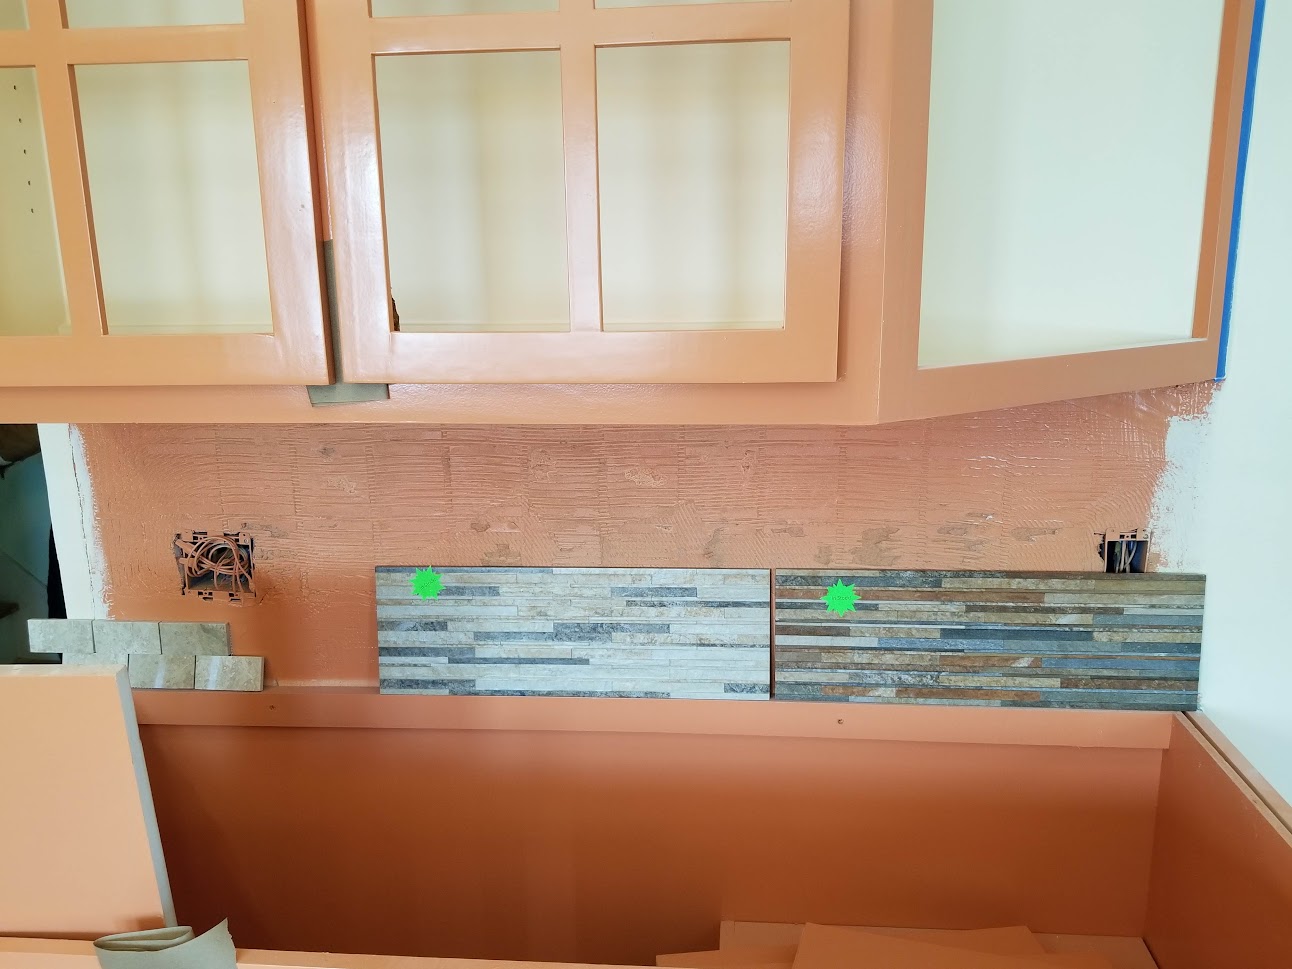
And next is the backsplash. We started off wanting something plain and simple that would match the wall color. But plain tile disappears. So we thought we need smaller tiles. That was better, but still not quite there, see below.

Also, prices range from $3-80 per square foot. We also had to consider that black pearl countertops would change the balance as well. It came down to the two options below:
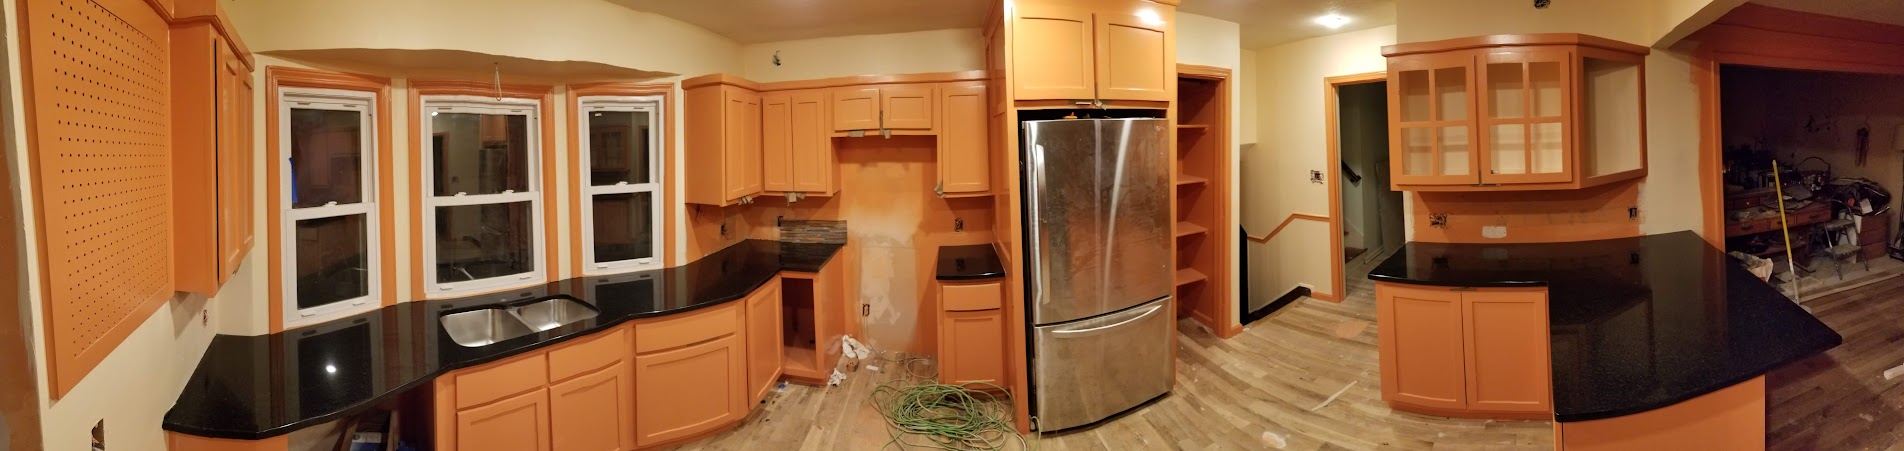
Construction got behind 1 day and then a 2nd day because of bad weather and someone getting sick. On the day they were supposed to put in the countertops, no one showed up. I went shopping for lights at 7PM and when I got home three men were fitting the countertops, grinding granite in the driveway and fitting the new sink. One enjoyed his 0% alcohol heineken. All done by 10PM.
Shortly after we got the big stuff in. And then I had the epiphany of getting some art work from our good friend Dierk Van Keppel at
http://www.rockcottageglassworks.com/ . And then we had a functional kitchen and things slowed down a lot. I got obsessed with wifi lighting and invested heavily in the Lutron Caseta system. A premium price, but only by 10% and they are the best. Electronic stuff that just works is worth a premium. Took some time to get drawer handles in. Bought back the cabinet people to add some internal shelves on rollers. And all the little loose ends.
Fast forward to March 23, or 2 months since we started. 98% done and all is fine. The color grabs your attention and changes throughout the day. I’ve been trying to create a good HDR image and failing so far. So here is the way it looks when fully lit:

And a little darker

I applaud your choice of tile in the end and I like the color you picked out for the orange-ish (wood) color. What is that color or are you keeping it a secret? I would guess your lighter earth tone (some would call it yellow) to be SW Believable Buff? That’s my guess because I’ve used a lot of that and it’s very similar and looks excellent with black and white. Also like your black countertops with the stainless steel (and again, the right tile choice). Very nice! I know you’re proud of it because it’s an art thing to get done with something like that and then lay back and look at it and say to yourself: “I did that!” You really did do an excellent job, it looks outstanding! “-)